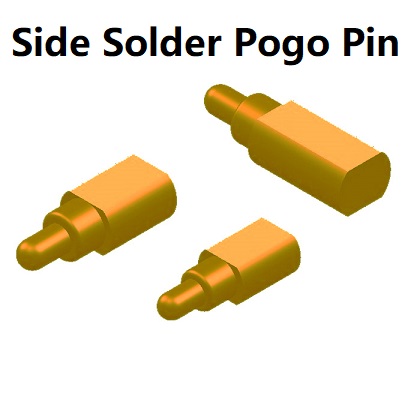
How to solder wires to pogo pins?
Pogo pins, also known as spring-loaded pins, are essential components in electronics for creating temporary electrical connections. They are widely used in test fixtures, programming jigs, charging docks, and modular devices. Soldering wires to pogo pins can be challenging due to their small size and heat-sensitive springs. This guide will walk you through the process while addressing common pitfalls and best practices.
Tools and Materials Required
Before starting, gather these items:
-
Pogo pins (choose barrel size based on your application: 0.5mm–2.5mm diameter)
- Wire (stranded or solid-core, 24–30 AWG recommended)
- Soldering iron (adjustable temperature, 25–40W ideal)
- Solder (60/40 leaded or lead-free rosin-core)
- Flux (liquid or paste, optional but highly recommended)
- Helping hands or vise (to stabilize components)
- Heat shrink tubing or electrical tape
- Wire strippers
- Safety glasses and ventilation
Step 1: Prepare the Pogo Pin and Wire
A. Inspect the Pogo Pin
- Pogo pins consist of a plunger (movable tip), barrel (outer casing), and spring (inside the barrel). Avoid overheating, as this can damage the spring’s temper.
- If the pin has a solder cup (a small indentation at the base), it simplifies wire attachment. For flat-base pins, wrap the wire around the barrel.
B. Strip and Tin the Wire
1. Strip 3–5mm of insulation from the wire using wire strippers.
2. Pre-tin the exposed wire:
- Apply flux to the strands.
- Touch the soldering iron to the wire, then feed solder until the strands are fully coated. This prevents fraying and ensures better adhesion.
Step 2: Secure the Pogo Pin
- Use helping hands or a vise to hold the pogo pin upright. If working with multiple pins, consider using a PCB holder or alignment jig.
- Pro Tip: Wrap a damp cloth around the pin’s spring area to dissipate heat and protect it during soldering.
Step 3: Apply Flux and Heat
1. Apply a small amount of flux to the pogo pin’s solder cup or base. Flux improves solder flow and prevents oxidation.
2. Set your soldering iron to 300–350°C (570–660°F). Higher temperatures risk spring damage; lower temps may cause cold joints.
Step 4: Solder the Wire to the Pogo Pin
A. For Solder-Cup Pins
1. Place the tinned wire into the solder cup.
2. Touch the soldering iron tip to the cup for 1–2 seconds to melt the existing solder (if pre-tinned) or add a small amount of fresh solder.
3. Allow the solder to flow around the wire, creating a concave fillet. Avoid excessive solder, which can stiffen the pin or cause shorts.
B. For Flat-Base Pins
1. Wrap the tinned wire around the pin’s barrel.
2. Hold the iron against the wire and barrel for 2–3 seconds, then feed solder into the joint until it wicks evenly.
3. Ensure the solder forms a smooth connection without bridging to adjacent components.
Step 5: Cool and Inspect
- Let the joint cool naturally. Do not blow on it, as rapid cooling can weaken the bond.
- Check for defects:
- Cold joint: Dull, grainy appearance. Reheat and add flux if needed.
- Solder bridges: Use desoldering braid to remove excess.
- Spring functionality: Test the plunger’s movement to confirm the spring wasn’t compromised.
Step 6: Insulate the Connection
- Slide heat shrink tubing over the joint and apply heat with a heat gun. Alternatively, wrap the joint with electrical tape.
- This prevents short circuits and adds strain relief.
Advanced Tips and Troubleshooting
1. High-Density Applications
- Use magnifying glasses or a microscope for precision when soldering small pins (e.g., 0.5mm diameter).
- Kapton tape can insulate adjacent pins during soldering.
2. Alternative Methods
- Spot welding: Suitable for mass production; avoids heat exposure.
- Conductive epoxy: A no-heat option, but less durable than solder.
3. Spring Damage Recovery
If the plunger stops retracting:
- Replace the spring with a compatible one.
- Soak the pin in isopropyl alcohol to remove debris.
Safety and Best Practices
- Work in a ventilated area: Solder fumes contain irritants.
- Use ESD-safe tools: Protects sensitive components.
- Test continuity: Use a multimeter to verify connectivity post-soldering.
Conclusion
Mastering the technique of soldering wires to pogo pins requires patience and attention to thermal management. By following these steps, you’ll ensure reliable connections for applications ranging from prototyping to industrial testing. Always prioritize component safety and joint integrity over speed, and refine your approach based on the specific pin type and project requirements.
